TaskP Product Designer for WooCommerce
- 01. Installation
- 02. Installation (Advanced)
- 03. Automatic Update For Premium Version
- 04. Configuring Font Category ( Pro )
- 05. Configuring Art Category ( Pro )
- 06. Configuring Product Attributes
- 07. Configuring Products with Design
- 08. Configuring Global Settings.
- 09. Front Product Designer.
- 10. Download Design File After Placing Order
01. Installation
Back To TopFREE VERSION INSTALL FROM WORDPRESS DASHBOARD
- TaskP Product Designer Free Version Download

- MANUAL INSTALL FROM WORDPRESS DASHBOARD
If your server is not connected to the Internet, then you can use this method-
- Download the plugin by clicking on the free download button above. A ZIP file will be downloaded.
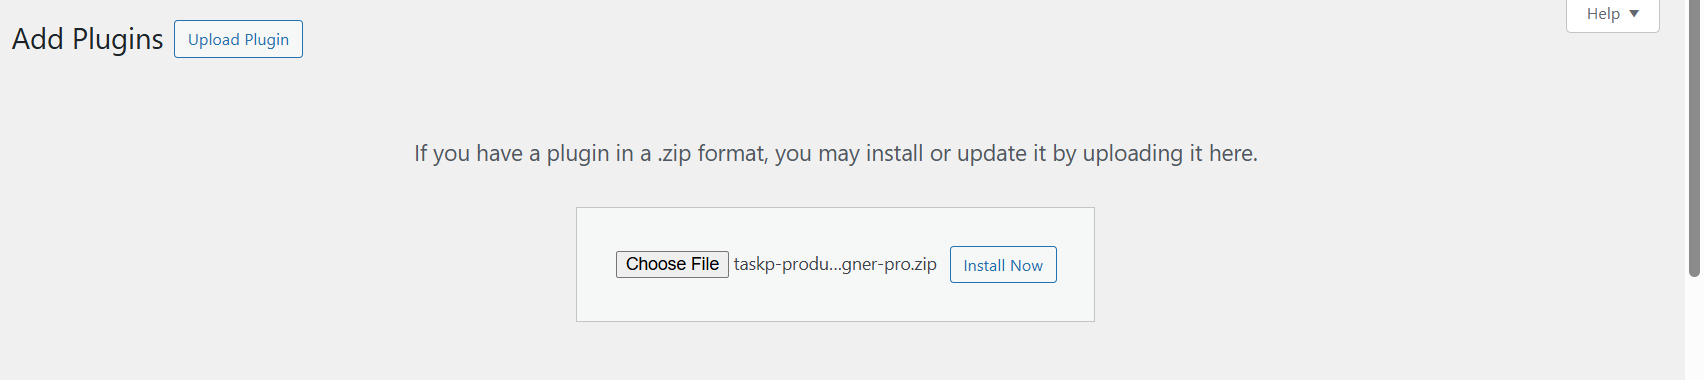
- Login to your site’s admin panel and navigate to Plugins -> Add New -> Upload.
- Click choose file, select the plugin file and click install
INSTALL USING FTP
If you are unable to use any of the methods due to internet connectivity and file permission issues, then you can use this method-
- Download the plugin by clicking on the free download button.
- A ZIP file will be downloaded.
- Unzip the file.
- Launch your favorite FTP client. Such as FileZilla, FireFTP, CyberDuck, etc. If you are a more advanced user, then you can use SSH too.
- Upload the folder to
wp-content/plugins/ - Log in to your WordPress dashboard.
- Navigate to Plugins -> Installed
- Activate the plugin
02. Installation (Advanced)
Back To TopThe advanced feature of TaskP Product Designer Pro for WooCommerce has been packed in an extension. To enable advanced version of this plugin on your site, you need to enable premium extension besides the Free Version.
=> 1. Login to TaskPlugins.com website.
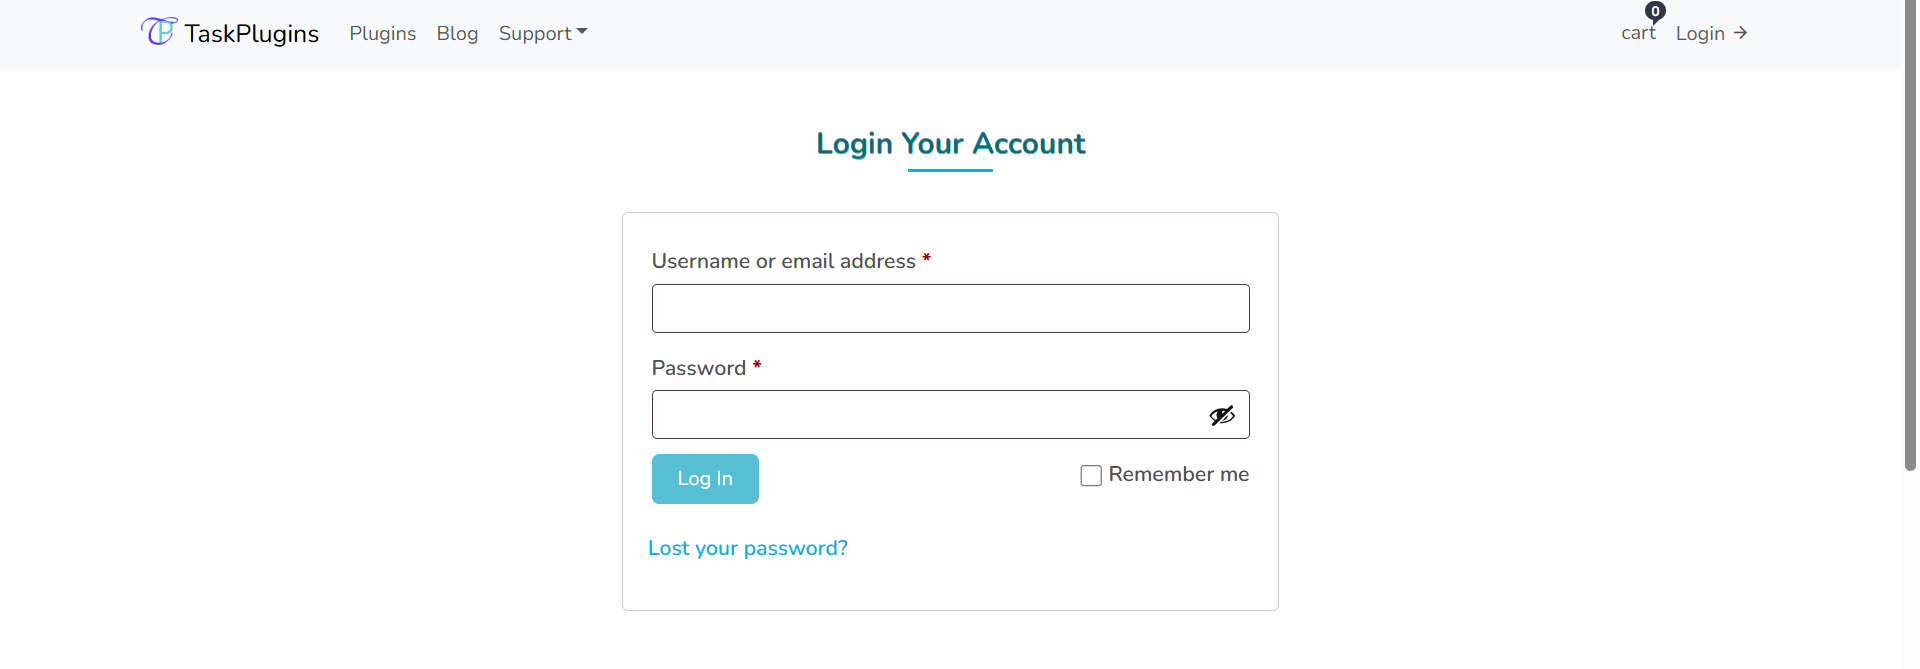
=> 2. Head to the My Downloads from My Account.
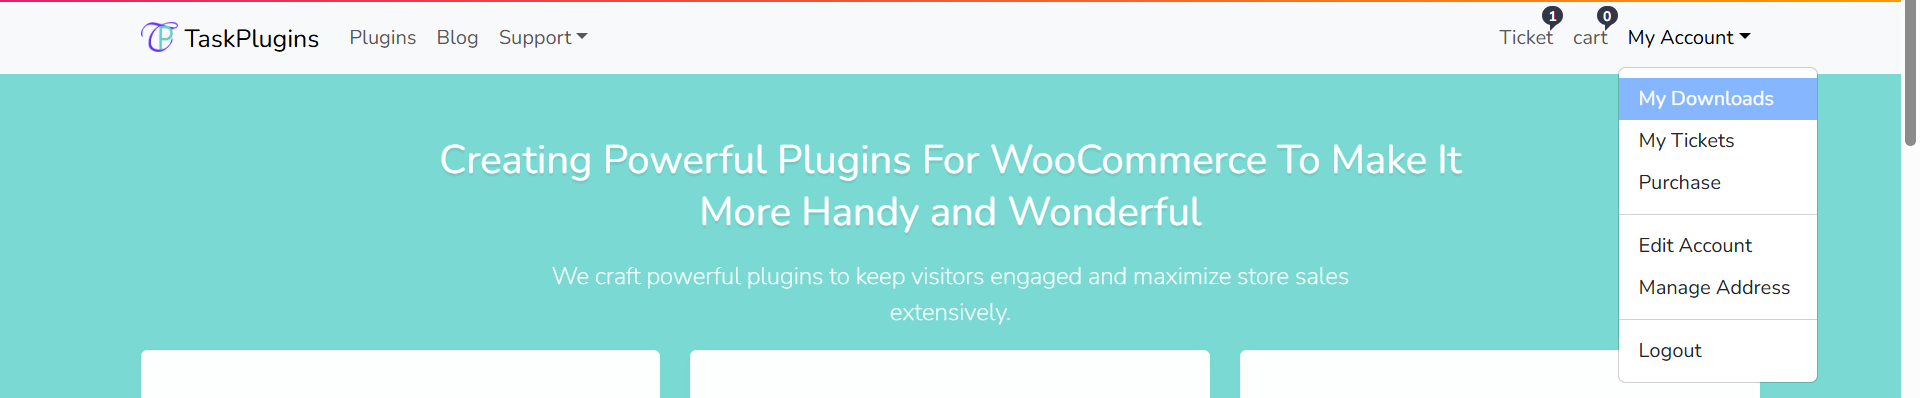
=> 3. Press download button to download TaskP Product Designer Pro for WooCommerce plugin.

=> 4. Navigate to Plugins >> Add New and Press Upload Plugin to Install and Activate download taskp-product-designer-pro plugin.
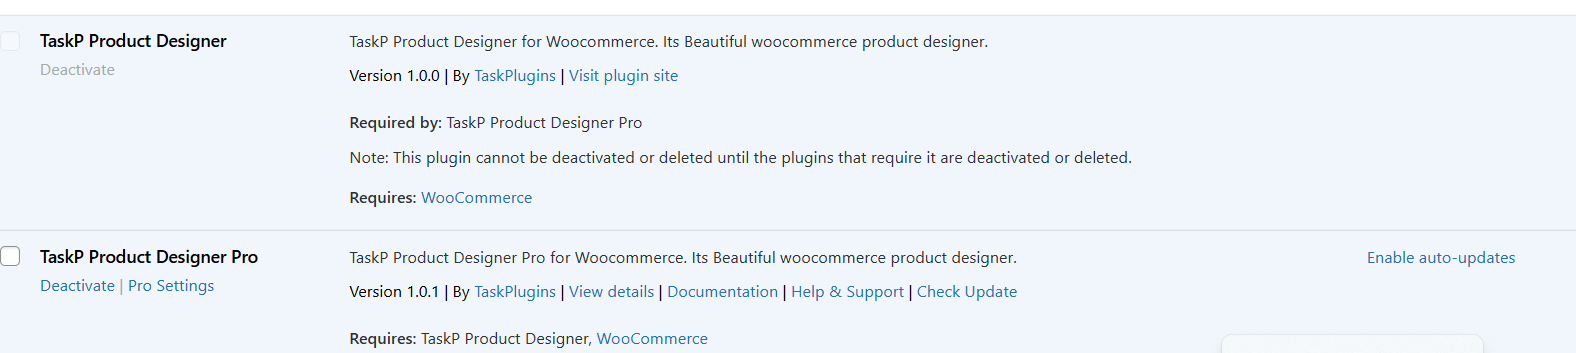
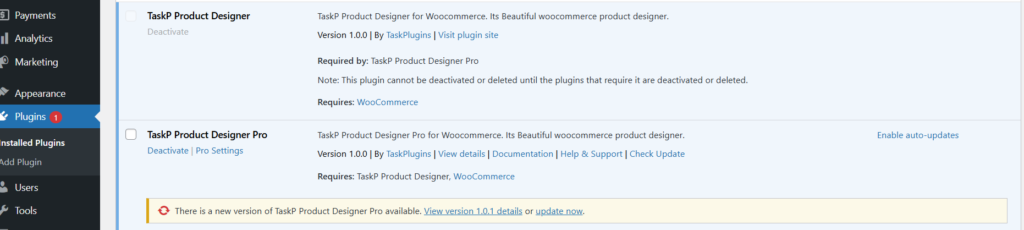
=> 5. After Installing Premium version of TaskP Product Designer Pro for WooCommerce plugin. It would appear after free version
03. Automatic Update For Premium Version
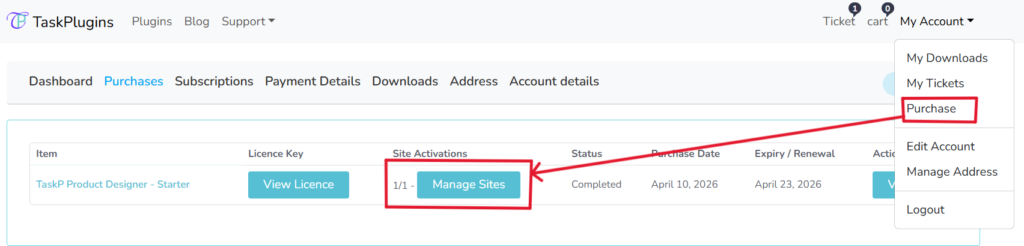
Back To TopNavigate to to your My Account >> Purchases from TaskPlugins.com.
Firstly, register your domain where automatic update for TaskP Product Designer Pro plugin needs to activate. Click the Manage Sites button.
Click the Register New Domain button.
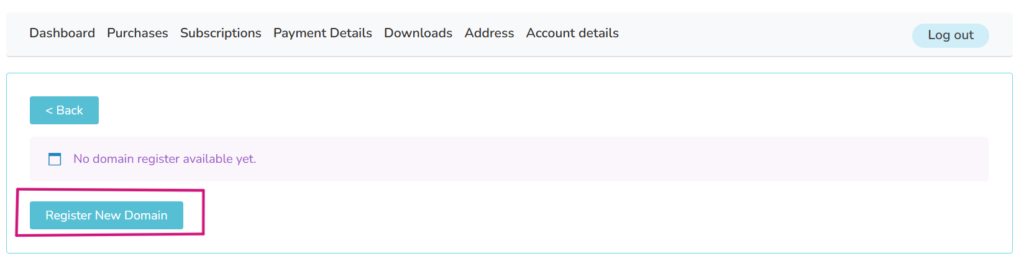
Enter you domain name in domain area and press Add Domain button.

Secondly, Each purchase of item comes with license key, click the View License from purchases.
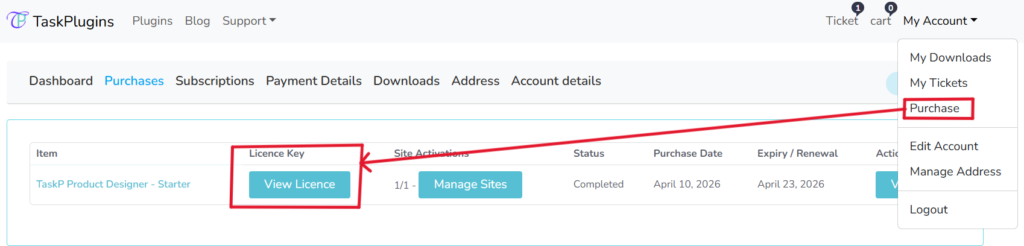
Copy the License Key from the view license.

After copying the License Key, head to the site backend where automatic update needs to activate. Navigate to TaskP Designer Pro >> Settings >> License. Paste the copied License Key code in License Key field. When it's done, press the Save License button.

Finally, after successfully registering domain name in the dashboard given at taskplugins.com and adding purchase key plugin's License Key section. The following update notice would appear in Plugins section.
04. Configuring Font Category ( Pro )
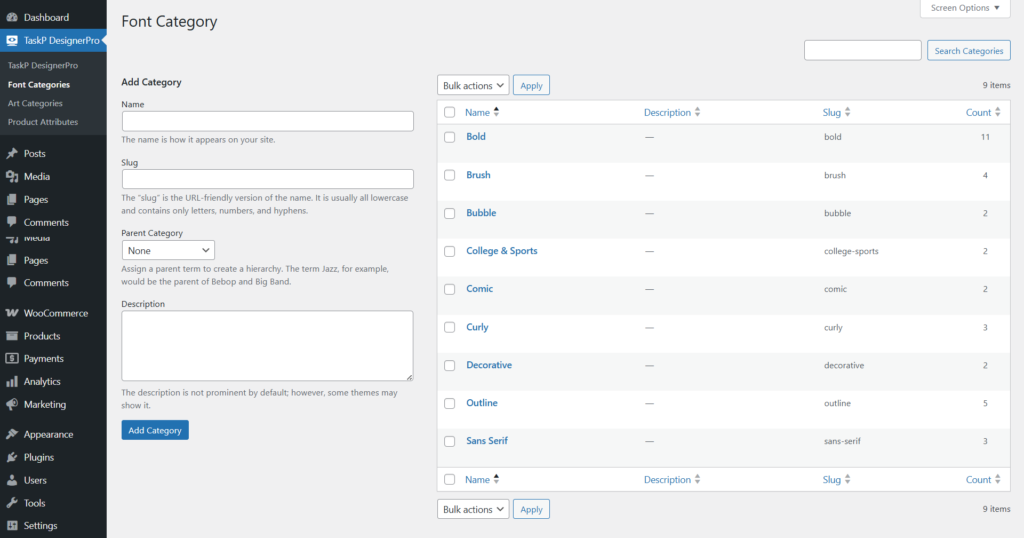
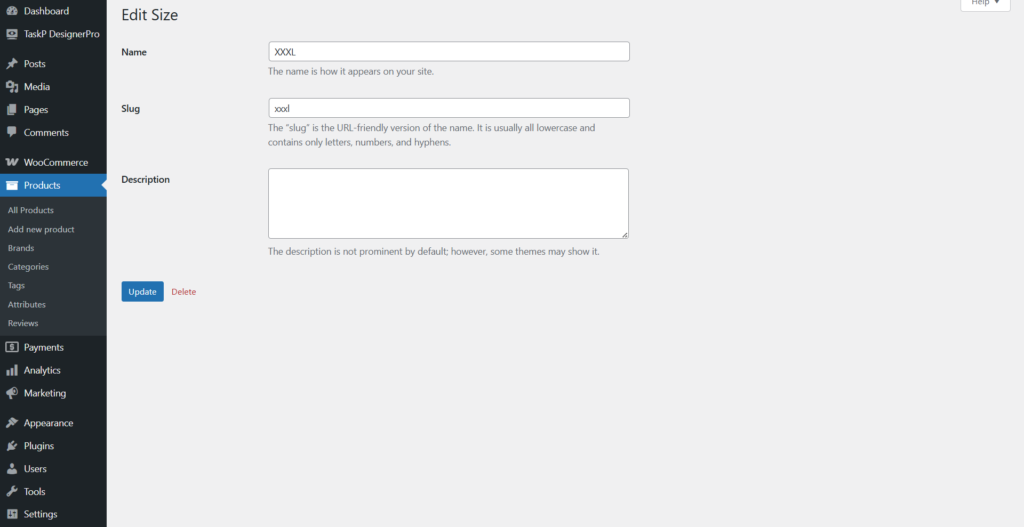
Back To TopNavigate to Admin Dashboard >> TaskP Designer Pro >> Font Categories. Steps to Add and Edit Font Categories.
- Click an existing font category name to edit it, or use the 'Add Category' form and click 'Add Category' to create a new one.
- The name and slug fields are required for all font categories.
- Because font selecting does not support child categories, the parent category always returns none.
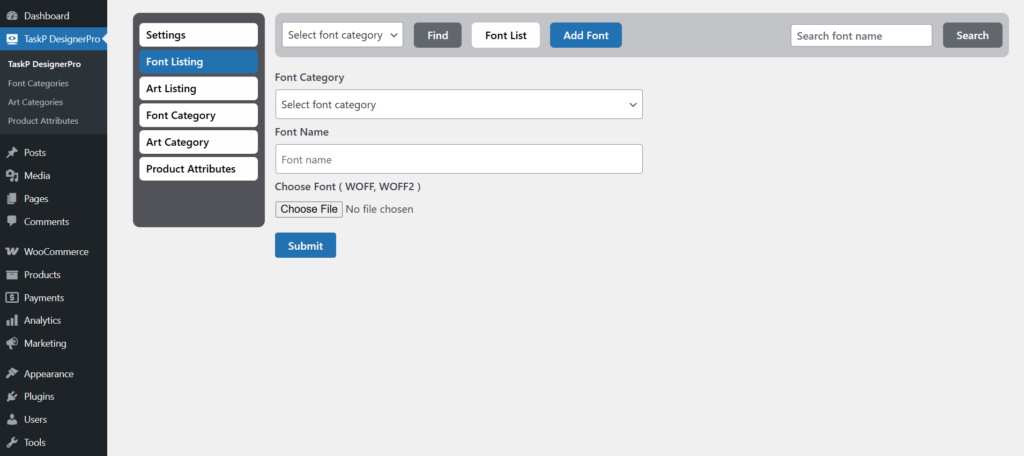
Navigate to Admin Dashboard >> TaskP Designer Pro >> Font Listing >> Add Font. To upload new font files, click the "Add Font" button situated at the top of the font listing menu.

Follow these steps to add a font:
- Font Category: Select your font category field the dropdown. Should it be unavailable, go to the Dashboard menu and create a new font category.
- Font Name: Enter the name in the provided field.
- File Attachment: Click the 'Choose File' button to upload your font file. Please note that the font uploader only supports WOFF and WOFF2 file formats.
- Submit: Click to submit all changes.
Note: All fields are required.
Navigate to Admin Dashboard >> TaskP Designer Pro >> Font Listing. When you mouse over the font selection box, two options will appear.
- Delete: Click the cross icon to remove the font instantly
- Edit: Click the pen icon to modify the font settings.

Follow these steps to edit a font:
- Font Category: Select your font category field the dropdown. Should it be unavailable, go to the Dashboard menu and create a new font category.
- Font Name: Enter the name in the provided field.
- File Attachment: Click the attachment button to upload your font file. Please note that the font uploader only supports WOFF and WOFF2 file formats.
- Submit: Click to submit all changes.
Note: All fields are required.

All font categories are displayed in the front-end product designer, as shown below.

All uploaded fonts will be displayed in the front-end product designer, as shown in the image below.

05. Configuring Art Category ( Pro )
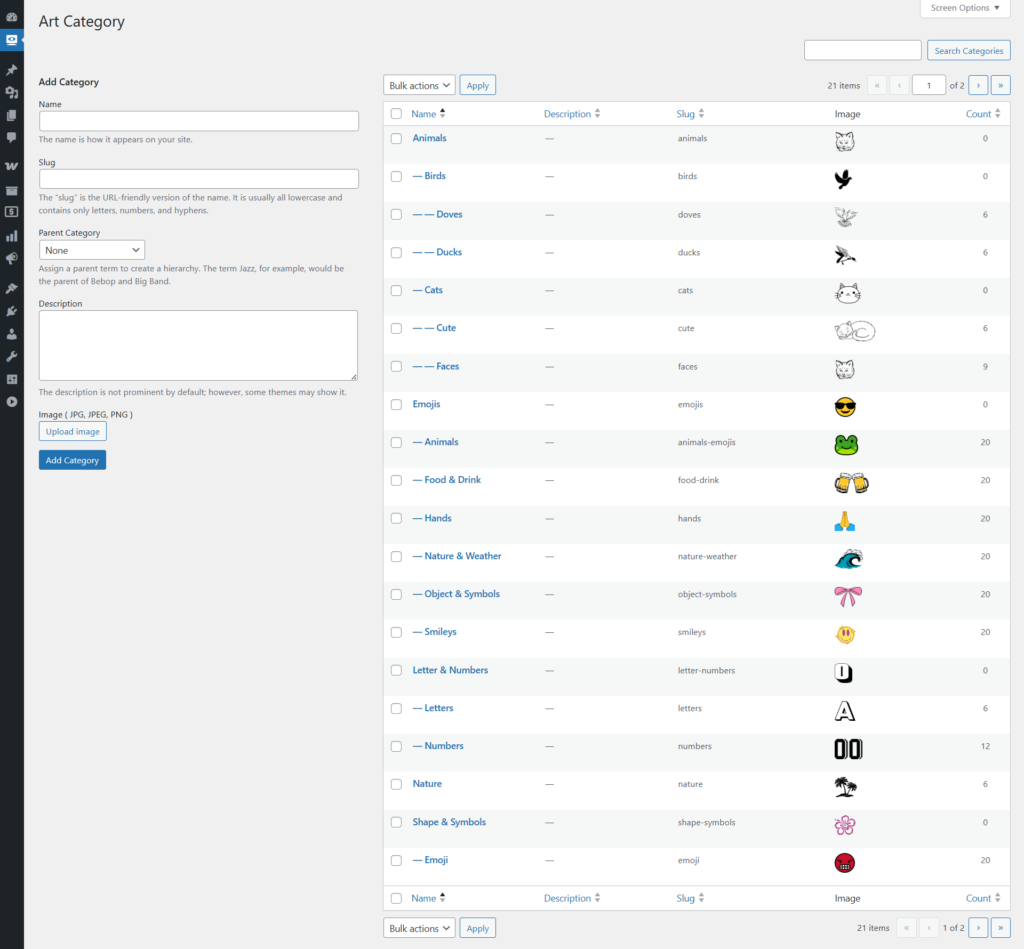
Back To TopNavigate to Admin Dashboard >> TaskP Designer Pro >> Art Categories. Steps to Add and Edit Art Categories.
- Click an existing art category name to edit it, or use the 'Add Category' form and click 'Add Category' to create a new one.
- The name and slug fields are required for all art categories.
- The system utilizes a hierarchical structure where the parent category defaults to 'none', supporting sub-categories (child levels) from level 1 down to level 3
- Please upload a valid image file; this field is required to proceed. Accepted file formats include JPG, JPEG, and PNG, with support for icons in these formats. The system specifically requires image inputs to be in JPG, JPEG, or PNG format. Only JPG, JPEG, and PNG files are supported for icon uploads
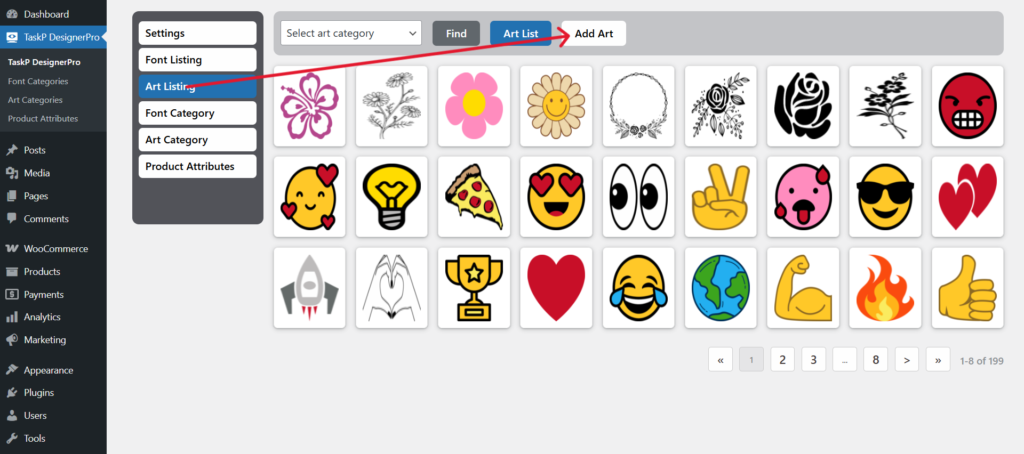
Navigate to Admin Dashboard >> TaskP Designer Pro >> Art Listing >> Add Art. To upload new art files, click the "Add Art" button situated at the top of the art listing menu.
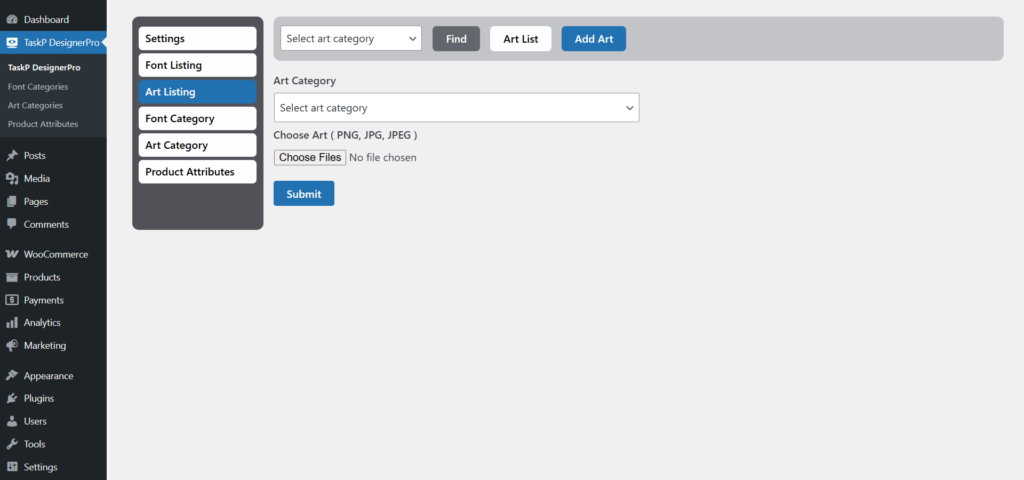
Follow these steps to add a art:
- Art Category: Select your art category field the dropdown. Should it be unavailable, go to the Dashboard menu and create a new Art Category.
- File Attachment: Click the 'Choose File' button to upload your artwork; please note that the uploader accepts PNG, JPG, and JPEG formats only. To select multiple files at once, hold down the Ctrl key on your keyboard while clicking on each art file.
- Submit: Click to submit all changes.
Note: All fields are required.
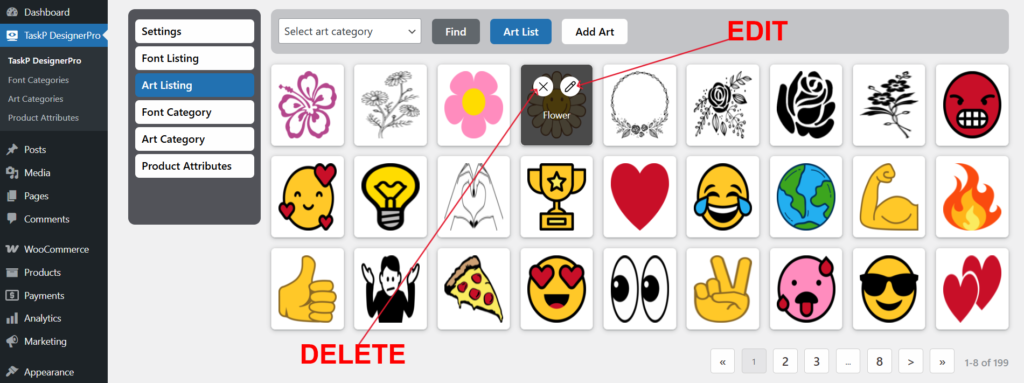
Navigate to Admin Dashboard >> TaskP Designer Pro >> Font Listing. When you mouse over the font selection box, two options will appear.
- Delete: Click the cross icon to remove the art instantly
- Edit: Click the pen icon to modify the art settings.
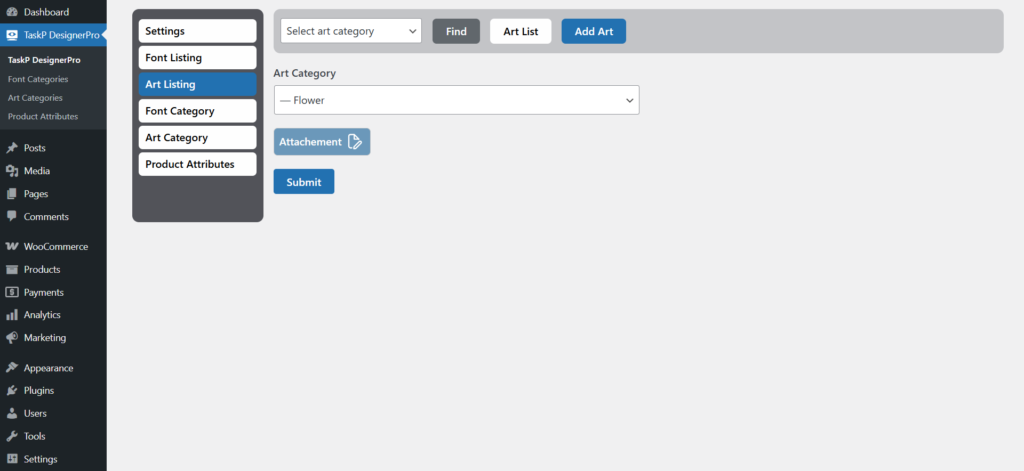
Follow these steps to edit a art:
- Art Category: Select your art category field the dropdown. Should it be unavailable, go to the Dashboard menu and create a new Art Category.
- File Attachment: Click the 'Attachment' button to upload your artwork; please note that the uploader accepts PNG, JPG, and JPEG formats only. Multiple file selection is not supported; You can only select one file at a time.
- Submit: Click to submit all changes.
Note: All fields are required.
All art categories are displayed in the front-end product designer, as shown in the image below.
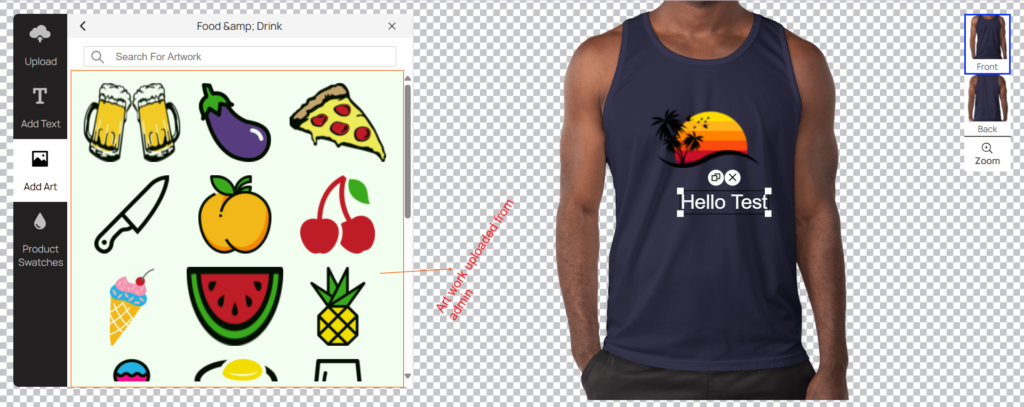
All uploaded art will be displayed in the front-end product designer, as shown in the image below.
06. Configuring Product Attributes
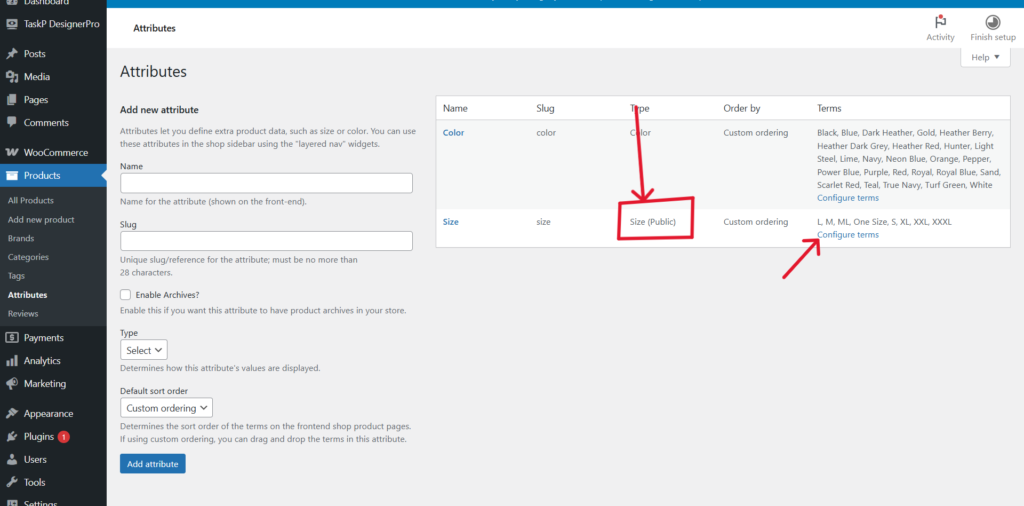
Back To TopNavigate to Admin Dashboard >> TaskP Designer Pro >> Product Attributes or Products >> Attributes. Click to attribute name to edit an exists attributes or in the Add new attribute using a selector attribute is necessary to create a dynamic user interface where selecting a color automatically updates the available size options form you will see the attributes and click Save Attribute/Add Attribute.
To ensure customers can pick the correct product variation, setting the attribute type to a selector (dropdown) is necessary for both color and size
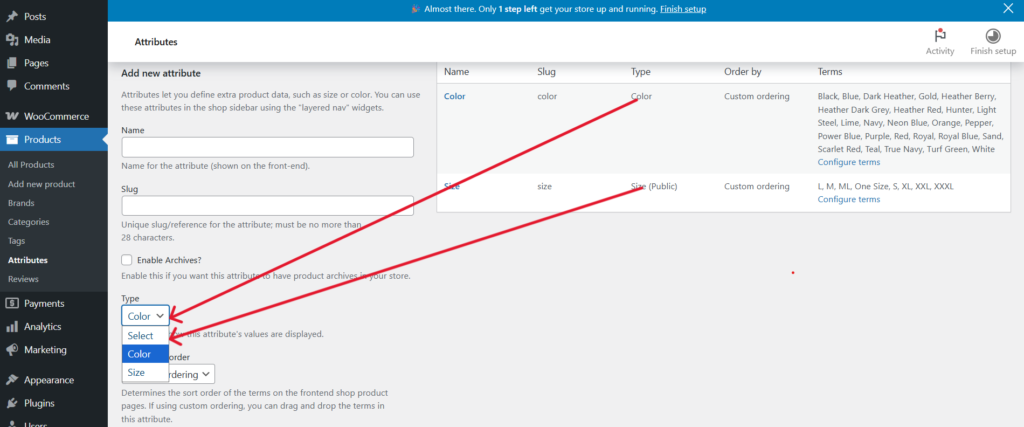
To ensure to selector type color is created and click to configure terms.
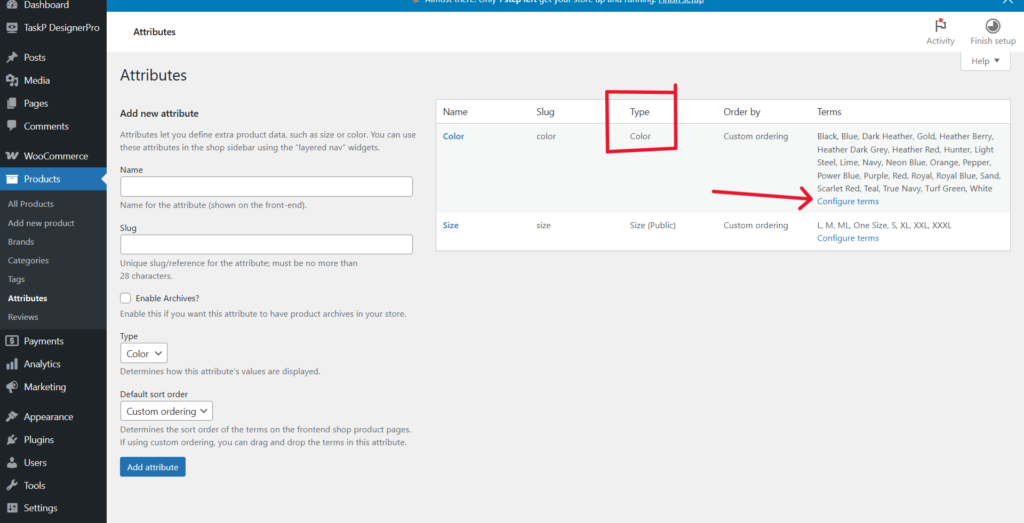
Navigate to Products >> Attributes >> configure terms. Click to color attribute name to edit an exists color attributes or in the Add new color attribute using a selector color attribute is necessary to create a dynamic user interface where selecting a color automatically form you will see the attributes and click Save Color Attribute / Add New Color Attribute.
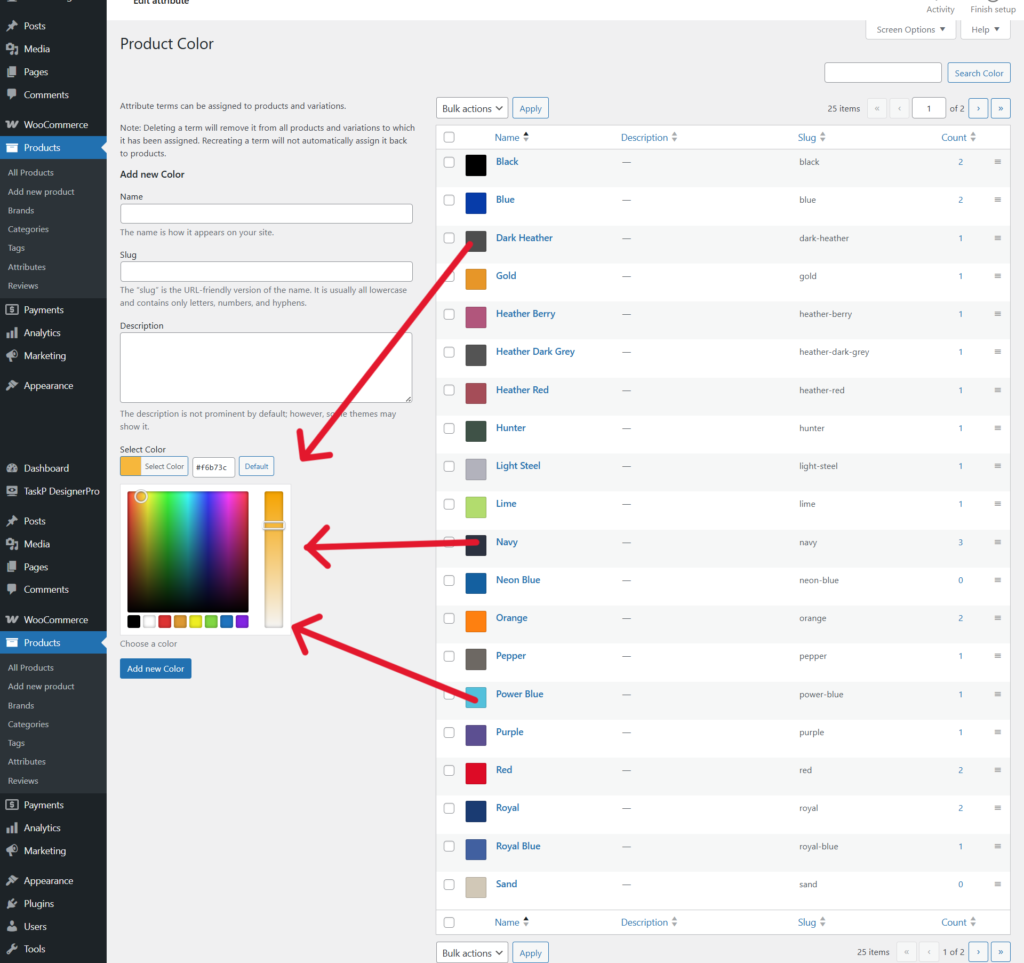
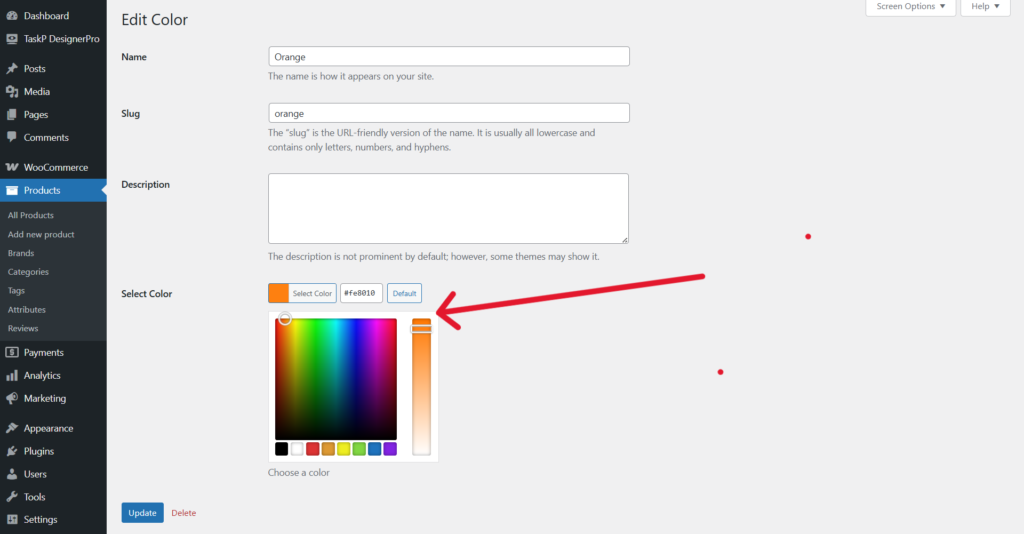
Navigate to Products >> Attributes >> configure terms >> color attribute edit. You can edit color attribute to update color code.
To ensure to selector type size is created and click to configure terms.
Navigate to Products >> Attributes >> configure terms. Click to size attribute name to edit an exists size attributes or in the add new size attribute form you will see the attributes and click Save size Attribute / Add New Size Attribute.
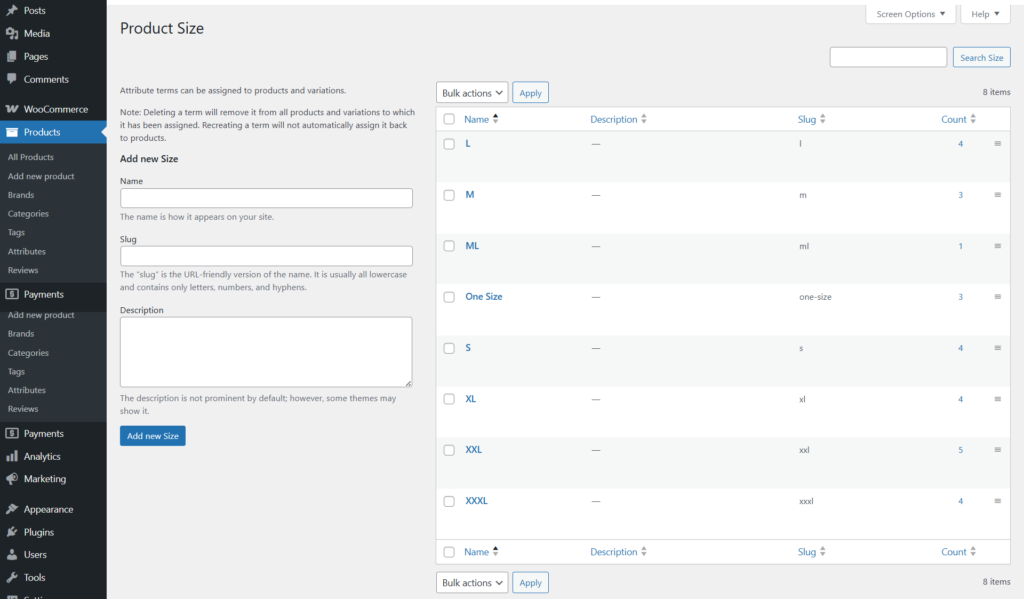
Navigate to Products >> Attributes >> configure terms >> size attribute edit. You can edit size attribute to Update size
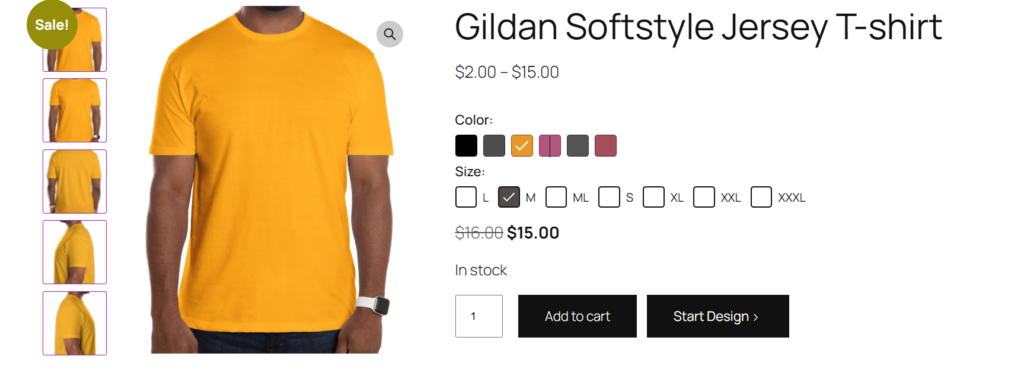
All color and size attributes are displayed in the front-end product designer, as shown below.
07. Configuring Products with Design
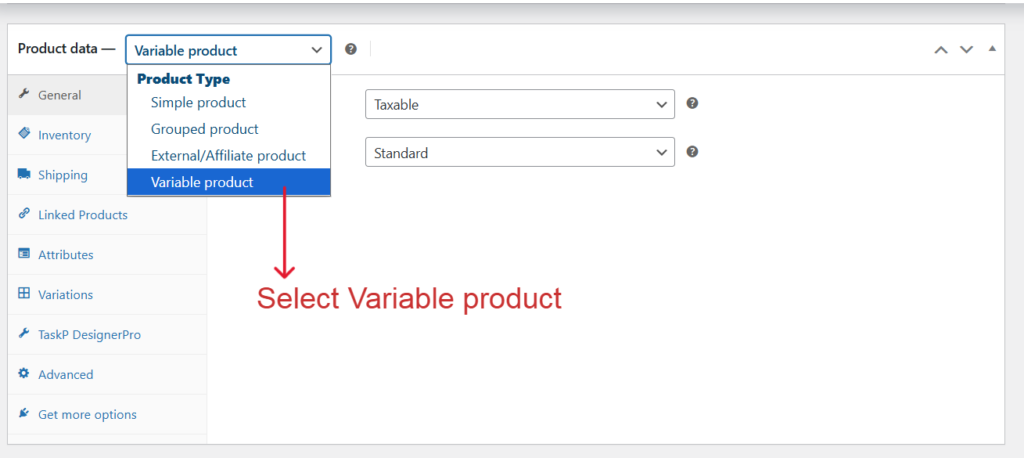
Back To TopNavigate to Admin Dashboard >> Products >> Add New Products or Admin Dashboard >> Products >> Edit Products. Steps to Add Products or Edit Products.
- It is mandatory to select 'Variable Product' from the product type dropdown menu, as shown in the image below.
Select the Attributes tab within the product editor to add pre-configured or custom attributes, such as size or color, to your variable product

Step-by-Step Attribute.
- Select Attribute: Choose a existing product attribute from the list.
- Need Help? If you haven't created any attributes yet, please refer to our documentation.
- Add or Edit: Click 'Add New' to create a new one, or Edit to change an existing one.
- Specify the required color and size in the fields provided, following the example as shown in the below image.
- Ensure the 'Visible on the product page' and 'Used for variations' options are enabled.
- Save Attribute: Click to save attribute all changes.

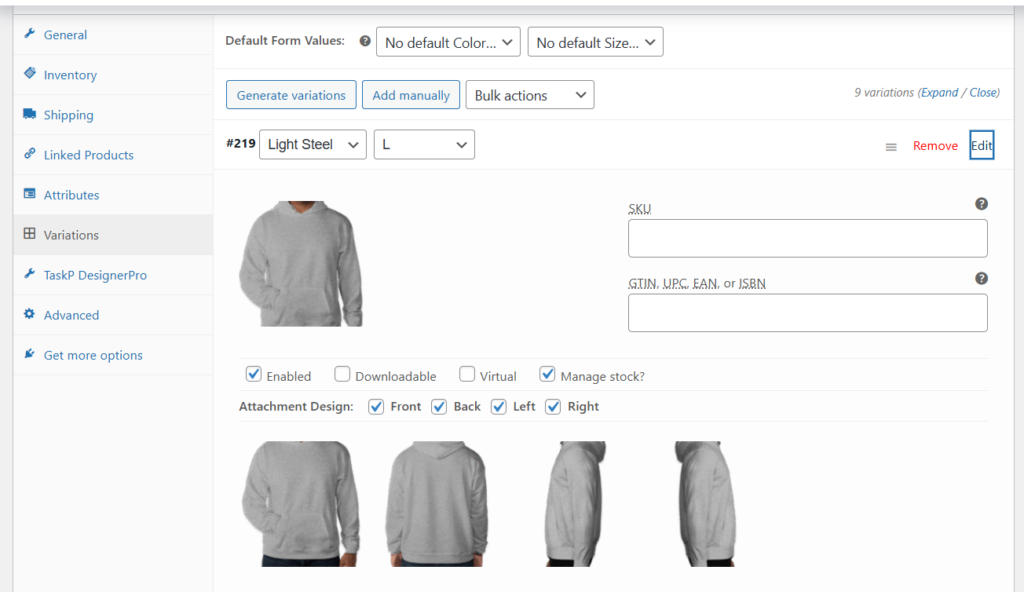
Select the Variations tab within the product editor to add pre-configured or custom attributes, such as size or color, to your variable product

Step-by-Step Variation.
- After creating your attributes in the Attributes tab, you can use the 'Generate Variations' button to create them automatically. Alternatively, you can select 'Add Manually' to create variations one by one.
- Each variation features a unique attachment design, which you can activate by checking the corresponding box. The selected image will then be displayed in the product design. You have four options available—Front, Back, Left, and Right—allowing you to enable only what you need.
- Kindly refer to the attached screenshot for the proposed attachment design, which requires a minimum of one and a maximum of four checkbox options.
- The main image for each product variation is automatically displayed as a gallery image upon selection, enhancing the visual experience on the single product page.
- Customize product pricing and details to match your requirements.
- Save Changes: Click to 'save changes' all changes.
Select the TaskP Designer Pro Tab within the product editor to enable specific product settings.
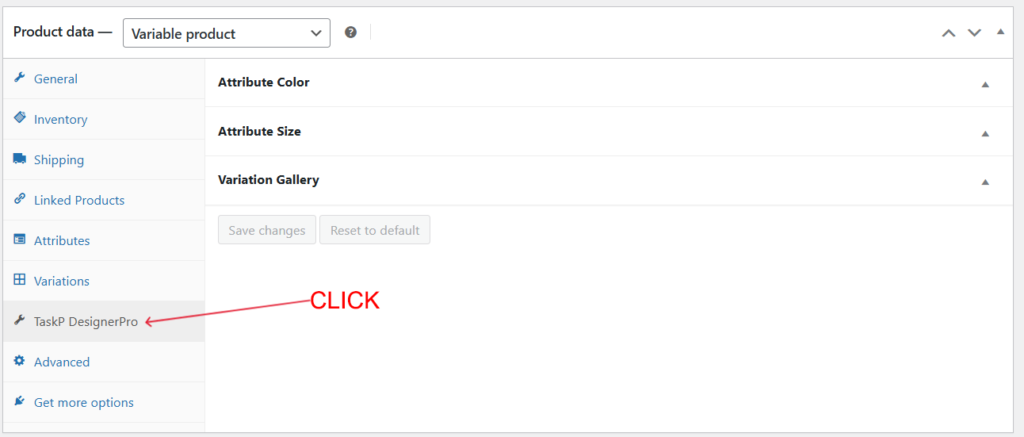
These product settings will apply to every product, provided that the global settings are not enabled click to see settings. Please note that all attributes and gallery styles are part of free features, with the exception of the checkbox and left-style gallery is premium version. Once you have made your changes, click the 'Save Changes' button.
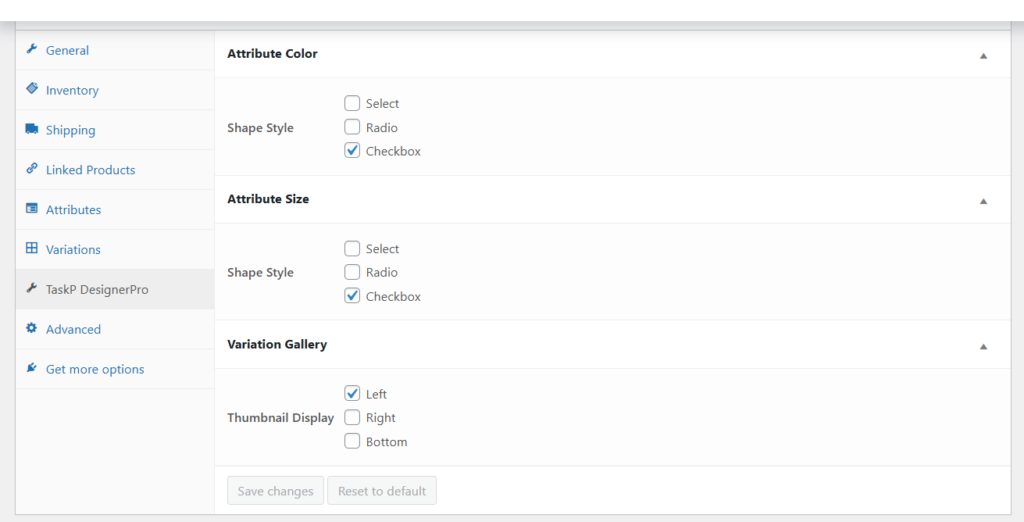
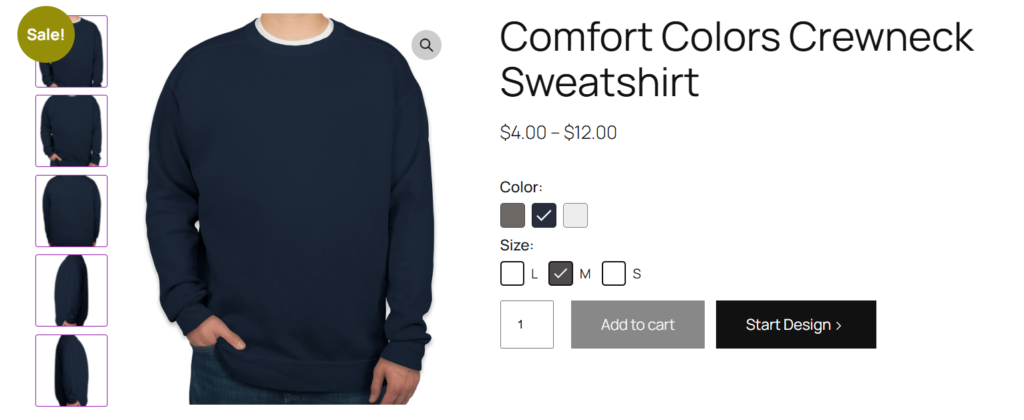
Because Global Variation Style is not enabled, the individual product settings will take precedence. Please refer to the image below for the front product view.
08. Configuring Global Settings.
Back To TopNavigate to Admin Dashboard >> TaskP Designer Pro >> Settings >> General. These settings override all individual product settings when the global variation style is enabled.
Once the product design is finalized, you can remove the base before printing. Alternatively, if you need the base included, you can easily enable it. We support multiple export formats, including PDF, PNG, JPG, JPEG, and SVG, allowing you to choose the best option for your needs.

Global Variation Style is active, so global settings now override individual product configurations. Please see the image below for the front product view
The design will be saved with the base included. The base is included in the design save by default. Enabling "Print Include Base" ensures the base is saved with the file. As shown in the PDF, the design saves with the base attached.
09. Front Product Designer.
Back To TopNavigate to Product page >> Single Product page >> Start Design. The product designer feature acts as a quick-access shortcut within the editor, as illustrated in the image below. Included below is a screenshot for your reference.

Navigate to Product page >> Single Product page >> Start Design >> Upload. Use the product editor to upload a unique, locally designed image or icon. Included below is a screenshot for your reference.

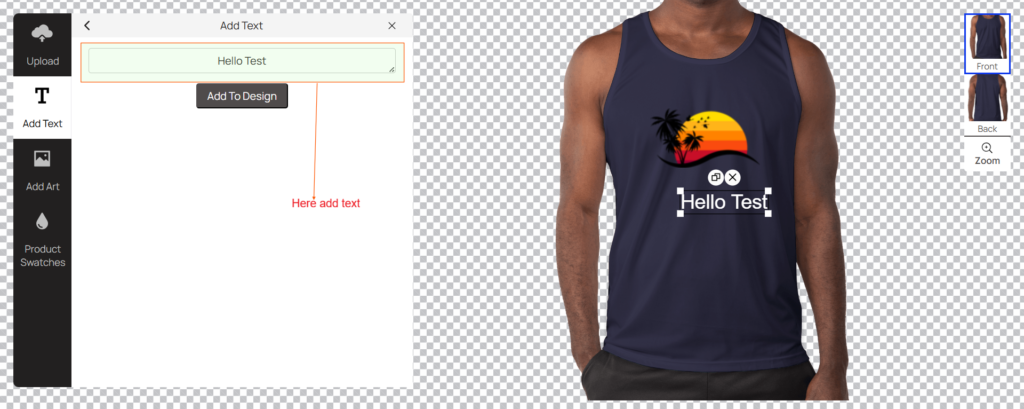
Navigate to Product page >> Single Product page >> Start Design >> Add Text. You can personalize this design by inputting your own text and adjusting the font and style. Included below is a screenshot for your reference.
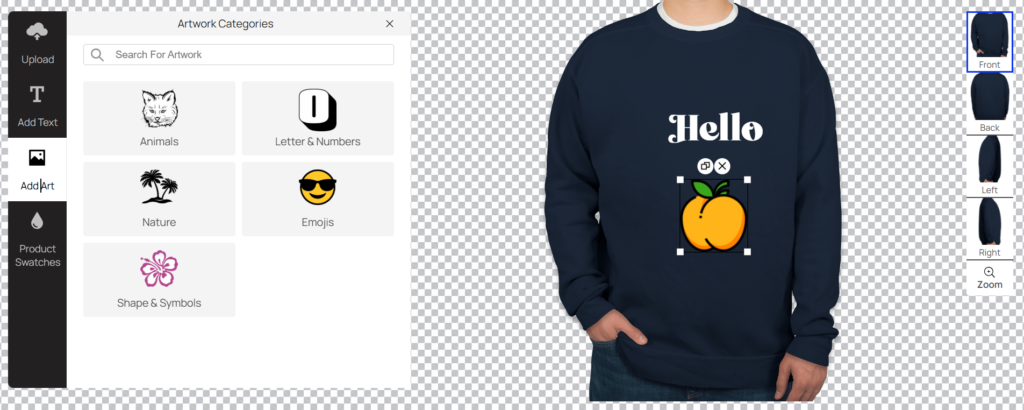
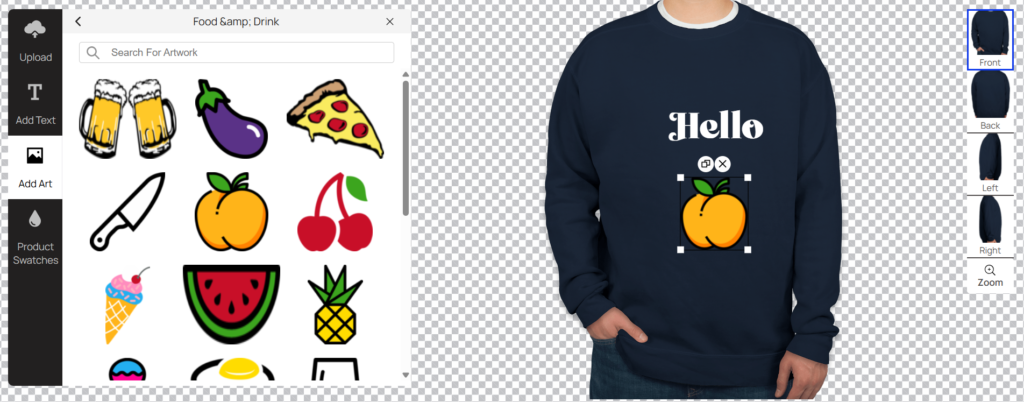
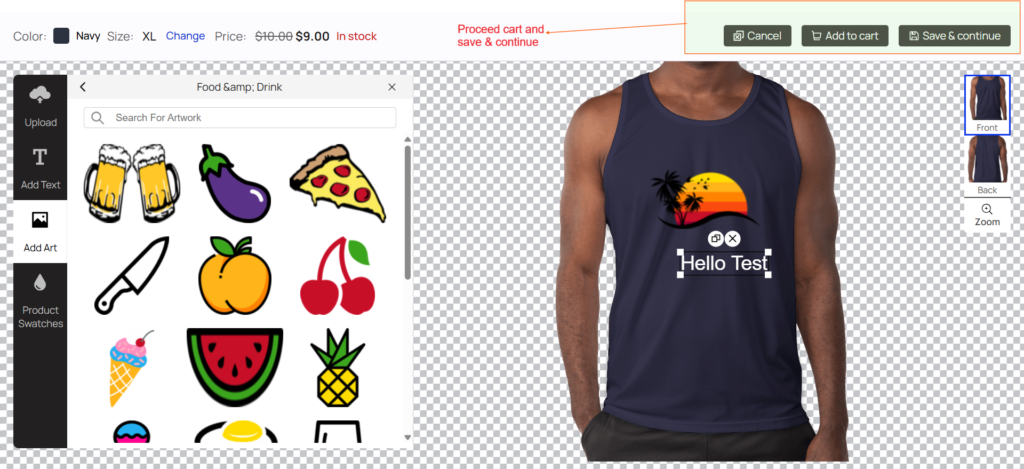
Navigate to Product page >> Single Product page >> Start Design >> Add Art. Use the built-in art feature to add pre-designed elements directly to your design. Included below is a screenshot for your reference.
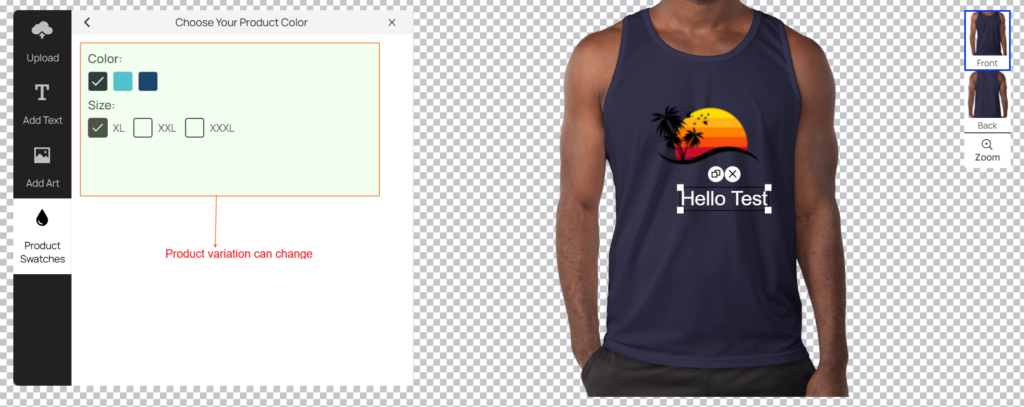
Navigate to Product page >> Single Product page >> Start Design >> Product Swatches. You can change product variations directly within the product design editor. Included below is a screenshot for your reference.
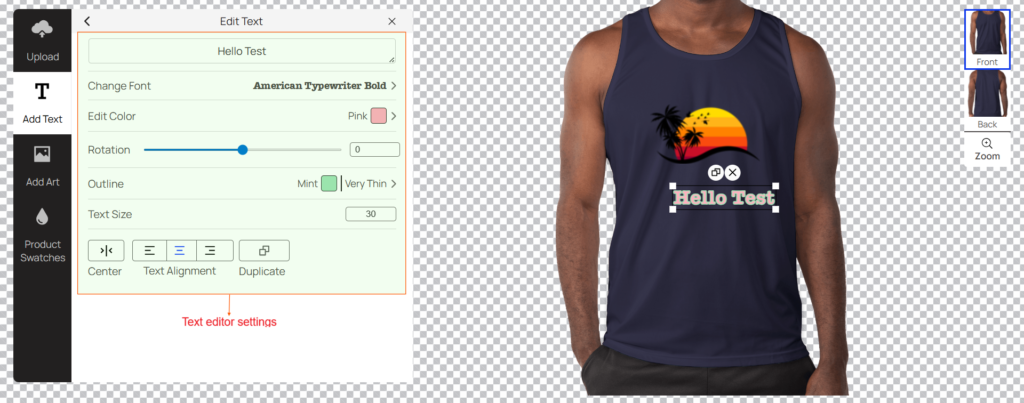
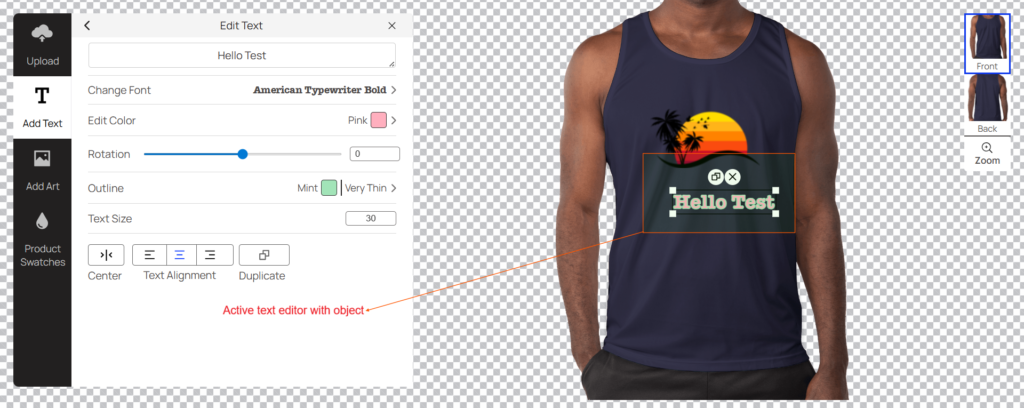
Navigate to Product page >> Single Product page >> Start Design >> Add Text. Customize this design by entering your text, selecting fonts, changing colors, rotating elements, and adjusting the outline, size, and alignment. When the text box is active, the formatting toolbar automatically fades into view. Included below is a screenshot for your reference.
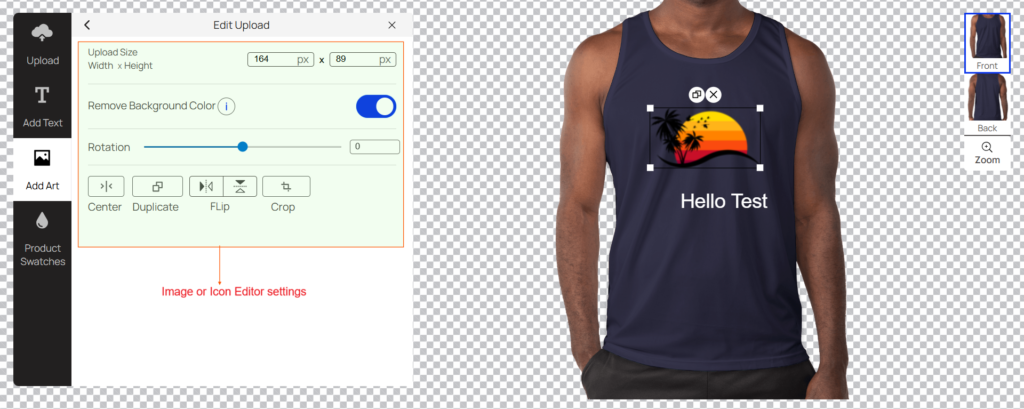
Navigate to Product page >> Single Product page >> Start Design >> Add Art or Upload. Once the image is active, you can fully customize the artwork by adjusting its width, height, rotation, alignment, and applying flips or crops to perfectly fit your design layout. The background removal tool currently only identifies and eliminates white backgrounds. Included below is a screenshot for your reference.
Once a text box or image is selected, the interface automatically displays the relevant modification toolbox and associated settings. Included below is a screenshot for your reference.
The design panel is located on the right. With our interactive zoom tool, you can see high-definition previews of your modifications to ensure every detail is perfect before finishing. Included below is a screenshot for your reference.

Once your design is finalized, you can immediately Add to Cart or choose Save and Continue to proceed later.
10. Download Design File After Placing Order
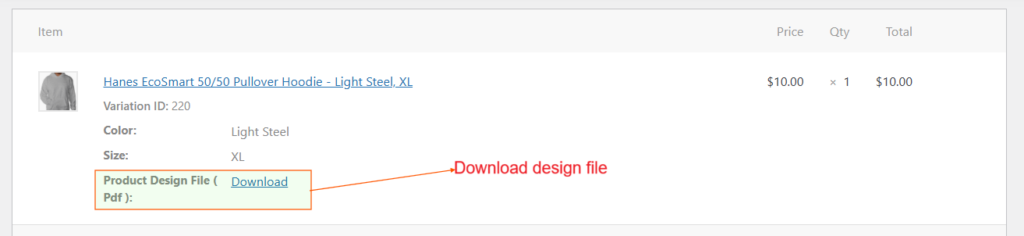
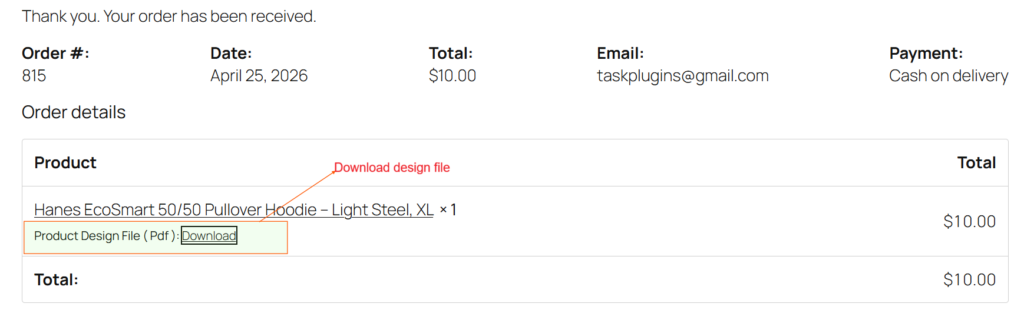
Back To TopNavigate to Checkout >> Place order >> Order Detail. Once your order is placed, you will be able to download your product design file directly from the confirmation order detail page. Additionally, a copy of the design file will be attached to your confirmation email.
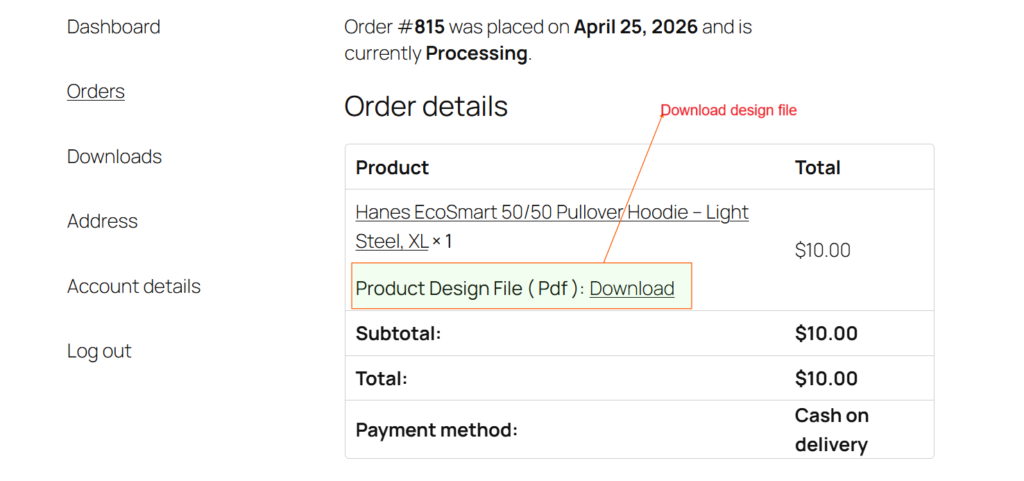
Navigate to My Account >> Orders >> View. You can download your product design file directly from your account order details.
Navigate to Admin Dashboard >> WooCommerce >> Orders >> Order Detail. Your product design file is available for direct download in the admin panel. You can access and download your design files directly through the admin dashboard.